
My week in photos
28 June 2012

What a hectic week its been - we are off to Hungary tomorrow for our dear friends Neil & Rita's wedding. We are so excited and we cannot wait to explore Budapest!
Here are some pretty snapshots from my week. See you next week - I am offline until Tuesday!


Have a good weekend and capture the little things.
xx
Here are some pretty snapshots from my week. See you next week - I am offline until Tuesday!


Have a good weekend and capture the little things.
xx
Midweek Supper
27 June 2012

So, among my many recipe books which I of course use all the time (wink wink) is Jamie Oliver's 30 Minute Meals - as soon as I watched the programme I had to have the book and it must be said I have cooked quite a few dinners from it. Wonky Summer Pasta being one of them. It is a quick and easy summer supper which tastes delicious.
Ingredients
2 egg yolks
140g parmesan cheese
zest and juice of a lemon (it says two in the original recipe but I find one enough)
small bunch of basil
fresh lasagne sheets (I used tagliatelle as I did not have fresh lasagne)
Roasted Butternut (optional - this is my personal touch)
Method
Separate the 2 eggs and put the yolks into a big serving bowl.
Add 3 tablespoons of olive oil and a good pinch of salt and pepper to the egg yolks. Grate the parmesan cheese and tip into the bowl along with the lemon zest and juice.
Chop the basil leaves and and add to the mixture. Stir until everything is mixed together and season with salt and pepper if you feel it needs it.
Stack the lasange sheets on a chopping board and carefully slice them into thin strips. (Otherwise if using tagliatelle cook as per the bag instructions). Add to the pan of boiling water.
Once cooked, use tongs to move the pasta to the egg mixture after draining but save some of the water. Toss the pasta and sauce together and add about 3 spoonfuls of the water to make it silkier if needed. Sprinkle over some basil leaves and parmesan and serve immediately with a side salad.
Enjoy!
x
Eggless Chocolate Cake
25 June 2012

I have been looking for a reliable egg-free chocolate cake recipe for a long time and I have finally found one. My mother-in-law is vegetarian and doesn't eat eggs so when she comes round to visit I like to have something I have baked or cooked which she can eat and finally tonight I have found the perfect recipe! Plus - it tastes divine.
Ingredients
170g (6 oz) butter
110g (4 oz sugar
2 tablespoons golden syrup
250ml milk
2 drops of vanilla extract (optional)
170g (6 oz) plain flour
55g (2 oz) cocoa
2teaspoon baking powder
1 teaspoon bicarbonate of soda
Method
Melt the butter the butter, sugar, syrup and milk over a low heat.
Once melted add the flour, cocoa, baking powder and bicarb.
Stir well and pour into a greased tin (large) or two smaller tins.
Cook for 30 minutes on 180 degrees or until cooked.
I used a buttercream icing recipe from Nigella which you can find here.
Enjoy x
Around Here
23 June 2012

I love our flat, but I cannot wait to move into our new house which is nestled in a rural Oxfordshire village with views overlooking fields. I looked around our little flat which has been home for almost 5 years and I took a few snapshots of my favourite things. I am hoping to create a more farm/cottage feel in our new home but will definitely still have these little items out on display still.
 |
| A shelf in our kitchen with our travel guides, special wine bottles, cat treats and my gorgeous red tea pot. The picture hanging on the wall is an Aboriginal painting given to us as a wedding gift. |
 |
| My beloved cookbooks - I will admit I do not use them as often as I should but that is my new goal when we move house. |
 |
| My pretty cake tins which are always filled with baked goods for our lunch box or an evening treat with a cup of tea before bed. |
 |
| Our table in the lounge, filled with things from our travels and a little wooden cat curled up, which I picked up from a local shop in our town. |
 |
| A hand-painted creation we picked up in Florence in Sept '11. |
 |
| Two of our three painting we bought from Cape Town when we visit. |
 |
| My picture board in the study - full of photos and sentimental bits and bobs which remind me of special memories. |
DIY Canvas Print
22 June 2012

The latest craze at the moment on DIY and craft blogs is creating your own canvas print. I got my idea from Elsie Larson's A Beautiful Mess here. I wanted to use the colour red to keep our theme going in our kitchen/diner but wasn't sure what quote to use. I was standing in line for a coffee at work the other day and saw a mug with "Where there is tea, there is Hope" written on it. I had found my quote.
Here is how I did it.
Supplies needed
Canvas - I used 12" x 9"
Red Acrylic Paint or the colour of your choice
Vinyl letters
Modge Podge/Acrylic Gel Medium
Paintbrush
Here is how I did it.
Supplies needed
Canvas - I used 12" x 9"
Red Acrylic Paint or the colour of your choice
Vinyl letters
Modge Podge/Acrylic Gel Medium
Paintbrush
 |
| You can use vinyl letters but I just printed the quote on a label (1 per page) and then cut the letters out using scissors and then a sculpul for the more intricate parts. Place them loosely on the canvas so you have an idea on where you will stick them. |
 |
| Peel the letters and stick them onto the canvas. |
 |
| Paint the canvas with a thick layer of paint and let it dry overnight. |
 |
| Once the paint is dry, put a coat of modge podge or gel medium onto the canvas and let it dry. Tip: When using paint there is more of a chance of bleeding which you can see on my canvas, using spraypaint would prevent this.  I am really happy with the way my canvas turned out - it is now proudly displayed in the kitchen as you can see above. Claire x |
The Cats
21 June 2012

My cats are my world. I love them with all my heart and I thought I should introduce them. Henry and Lucy were born on the 5th October 2010 and we welcomed them into their new home on the 21st November 2010. As soon as I saw them at 4 weeks old I was in love.
As brother and sister they get on very well and love playing together, chirping at birds from the windowsills and getting brushed. Henry is more of a lap cat whereas Lucy prefers her own space. It must be said that they are the most gorgeous cats in our neighbourhood by far!
As brother and sister they get on very well and love playing together, chirping at birds from the windowsills and getting brushed. Henry is more of a lap cat whereas Lucy prefers her own space. It must be said that they are the most gorgeous cats in our neighbourhood by far!
 |
| Sitting at the favourite spot on the windowsill watching the birds |
 |
| Lucy on her chair in the study. |
 |
| Henry always likes to lie on the corner of the bed, preferably on clean clothes! |
 |
| Henry's other preferred spot - the couch. |
 |
| A beautiful close-up of Lucy. |
Daily Dose of Wisdom
20 June 2012

Today I wanted to make a list of things I wanted, needed and desired - things to get my started on my craft projects, some make up I need, clothes etc.
I ended up with this in front of me. I suppose these are the things that really matter in life. After that, its a bonus!
Have a good day and remember to capture the little things :)
Claire
x
I ended up with this in front of me. I suppose these are the things that really matter in life. After that, its a bonus!

Have a good day and remember to capture the little things :)
Claire
x
To make, create and sew
19 June 2012

The world wide web has what seems like billions of great ideas, inspirations and things which I would love to make and create. Seriously - I daydream about quitting my job and just making, baking, sewing, gardening and home-making. A girl is allowed to dream....
Here are some ideas I have found recently that I can't wait to try for myself.
Claire
x
Here are some ideas I have found recently that I can't wait to try for myself.
 |
| I love baking and giving my creations to friend and family, but I have always struggled to find a pretty and easy way to wrap my baked goods. This idea is easy and super cute. {Idea from Martha Stewart} |
 |
| I love this idea - using vintage or decorative bottles to store washing up liquid - pourers are easy to come by and these would look great in any kitchen. {Idea from Martha Stewart} |
 |
| There is nothing better than coming home after a long day and having an ice cold drink - this flavoured water is awesome and I love how Elsie has served them in Mason Jars too. {Idea from a Beautiful Mess} |
 |
| We had the privelage of having two weddings so we have a healthy collection of wedding cards which I do not want to throw away but had no idea how to preserve them in a pretty way rather than just in a box. This idea is perfect. {Herecomesthebridgeblog} |
 |
| I have a Canon 450d SLR camera and I do not have a proper camera bag. I do not like the way they look and have put off buying one. this is the perfect solution. pretty and does the job. {Idea from Make it and Love it} |
Claire
x

Daily Dose of Wisdom
18 June 2012


Location: A421, Buckinghamshire
Camera: iPhone 3GS
Effect: Instagram, Amaro
Quote: World of Our Own lyrics
The South African Crunchie
17 June 2012


The UK flapjack has been compared to a crunchie but for me the crunchie wins through and through.
Ingredients
180g butter
2 cups oats
1 cup coconut
1 cup sugar
1 cup flour
2 tbspn syrup
1 tspn bicarb
Method
Mix together the dry ingredients.
Melt the butter and syrup and add the bicarb until it froths.
Add to the dry ingredients.
Press mixture into a greased tray and cook at 180 degrees for 20 - 30 minutes.
Tip: Once cooked, cut into squares at put back into the oven (switched off) to dry out.
Add more syrup if you want a more gooey texture.
Enjoy with a cup of rooibos tea.
x
Daily Dose of Wisdom
14 June 2012

I have been a bit quiet on the wisdom front - I thought today this was particuarly apt for me as I am studing (well, OK, cramming) for my exam tomorrow.
Once tomorrow is over I can get my life back and get this blog on the road...
Claire x
 |
| Picture Source |
Once tomorrow is over I can get my life back and get this blog on the road...
Claire x
A father's love
12 June 2012

So, it is Father's day on Sunday and to give you some inspiration I thought I would share some beautiful as well as funny quotes and images I have found.
Enjoy! x
 |
| Picture Source |
 |
| Picture Source |
 |
| Picture Source |
 |
| Free printable at Simple as That |
 |
| Free printable at It works for Bobbi |
Weekend Snapshots
10 June 2012

Sundays in our household are normally for lie-ins, hearty breakfasts, chores, drinking tea and baking. I have been trying to avoid all of these today (apart from drinking copious amounts of tea of course) due to a looming exam on Friday. To cheer me up I thought I would showcase some of my pictures from the weekend. Enjoy.


Homemade Pizza
9 June 2012

Pizza - favourite food to me and thousands of others around the world. Personally, the best pizza I have ever tasted was in a small restaurant in rural Tuscany, near Pontessieve. The pizza was enormous and spilled over the edges of the plate it was served on. We sat outside in the candle-lit lapa, soaking up the Italian countryside, food and wine.
I have to say though, Magica Roma comes close second. This little gem of a restaurant can be found in Pinelands, Cape Town - my roaming ground as a child. I only recently went there for the first time, if you can believe that, and the pizza was gorgeous. I know my sister and her boyfriend frequently get take away pizzas from this place and I am not surprised. It beats any supermarket or take away pizza similar to Dominoes or Pizza Hut.
Tonight I decided that, what with the Euro 2012 a (well done Denmark!) and it being a Saturday night, a pizza was a must for our supper. I thought I would share my favourite pizza dough recipe - compliments of Mr Jamie Oliver.
Ingredients
500g strong white bread flour
1/2 tspn fine sea salt
7g sachet of dried yeast
1/2 tbspn golden caster sugar
2 tbspn extra virgin olive oil
325ml lukewarm water
Method
Sieve the flour/s and salt on to a clean work surface and make a well in the middle. In a jug, mix the yeast, sugar and olive oil into the water and leave for a few minutes, then pour into the well. Using a fork, bring the flour in gradually from the sides and swirl it into the liquid. Keep mixing, drawing larger amounts of flour in, and when it all starts to come together, work the rest of the flour in with your clean, flour-dusted hands. Knead until you have a smooth, springy dough.
Place the ball of dough in a large flour-dusted bowl and flour the top of it. Cover the bowl with a damp cloth and place in a warm room for about an hour until the dough has doubled in size.
Now remove the dough to a flour-dusted surface and knead it around a bit to push the air out with your hands – this is called knocking back the dough. You can either use it immediately, or keep it, wrapped in clingfilm, in the fridge (or freezer) until required. If using straight away, divide the dough up into as many little balls as you want to make pizzas – this amount of dough is enough to make about six to eight medium pizzas.
Timing-wise, it’s a good idea to roll the pizzas out about 15 to 20 minutes before you want to cook them. Don’t roll them out and leave them hanging around for a few hours, though – if you are working in advance like this it’s better to leave your dough, covered with clingfilm, in the fridge. However, if you want to get them rolled out so there’s one less thing to do when your guests are round, simply roll the dough out into rough circles, about 0.5cm thick, and place them on slightly larger pieces of olive-oil-rubbed and flour-dusted tinfoil. You can then stack the pizzas, cover them with clingfilm, and pop them into the fridge.
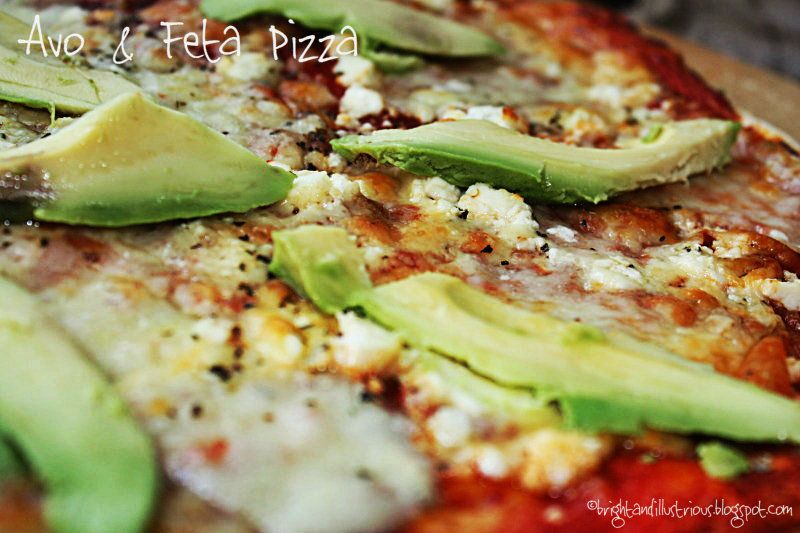
His recipe uses double of the above ingredients which makes 6-8 pizza bases typically, but I usually half this unless we are having guests. Tonight I decided to make 2 different pizza's - Avo and Feta and Jalepeno and Quorn Sausage (my husband is vegetarian).
I think they turned out pretty well and they tasted 100% better than any take-away pizza. So next time you fancy the timeless Pizza - make one yourself - it is well worth the time and effort.


I have to say though, Magica Roma comes close second. This little gem of a restaurant can be found in Pinelands, Cape Town - my roaming ground as a child. I only recently went there for the first time, if you can believe that, and the pizza was gorgeous. I know my sister and her boyfriend frequently get take away pizzas from this place and I am not surprised. It beats any supermarket or take away pizza similar to Dominoes or Pizza Hut.
Tonight I decided that, what with the Euro 2012 a (well done Denmark!) and it being a Saturday night, a pizza was a must for our supper. I thought I would share my favourite pizza dough recipe - compliments of Mr Jamie Oliver.
Ingredients
500g strong white bread flour
1/2 tspn fine sea salt
7g sachet of dried yeast
1/2 tbspn golden caster sugar
2 tbspn extra virgin olive oil
325ml lukewarm water
Method
Sieve the flour/s and salt on to a clean work surface and make a well in the middle. In a jug, mix the yeast, sugar and olive oil into the water and leave for a few minutes, then pour into the well. Using a fork, bring the flour in gradually from the sides and swirl it into the liquid. Keep mixing, drawing larger amounts of flour in, and when it all starts to come together, work the rest of the flour in with your clean, flour-dusted hands. Knead until you have a smooth, springy dough.
Place the ball of dough in a large flour-dusted bowl and flour the top of it. Cover the bowl with a damp cloth and place in a warm room for about an hour until the dough has doubled in size.
Now remove the dough to a flour-dusted surface and knead it around a bit to push the air out with your hands – this is called knocking back the dough. You can either use it immediately, or keep it, wrapped in clingfilm, in the fridge (or freezer) until required. If using straight away, divide the dough up into as many little balls as you want to make pizzas – this amount of dough is enough to make about six to eight medium pizzas.
Timing-wise, it’s a good idea to roll the pizzas out about 15 to 20 minutes before you want to cook them. Don’t roll them out and leave them hanging around for a few hours, though – if you are working in advance like this it’s better to leave your dough, covered with clingfilm, in the fridge. However, if you want to get them rolled out so there’s one less thing to do when your guests are round, simply roll the dough out into rough circles, about 0.5cm thick, and place them on slightly larger pieces of olive-oil-rubbed and flour-dusted tinfoil. You can then stack the pizzas, cover them with clingfilm, and pop them into the fridge.
His recipe uses double of the above ingredients which makes 6-8 pizza bases typically, but I usually half this unless we are having guests. Tonight I decided to make 2 different pizza's - Avo and Feta and Jalepeno and Quorn Sausage (my husband is vegetarian).
I think they turned out pretty well and they tasted 100% better than any take-away pizza. So next time you fancy the timeless Pizza - make one yourself - it is well worth the time and effort.


Subscribe to:
Posts (Atom)


Social Icons